1-set the background and the foreground like this:

2-Select the Gradient Tool and make sure that you are selecting the next settings :

3-now drag from the center of the document to the out like in the next pic:
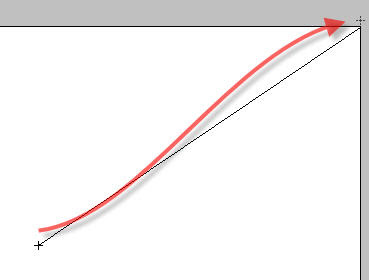
the result should be similar to this

4-duplicate the background layer then press Ctrl+T to free transform it and right click on the document then select Perspective:
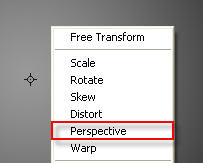
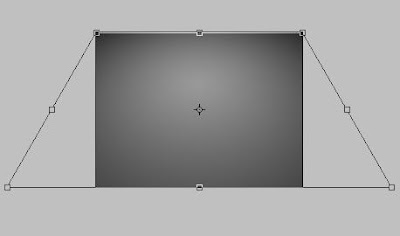
Now in the bottom of the document click and drag on of the edges to outside like the pic and press Enter when you done :
5-Now add a text to the center of the document and write the text you want to make it 3d text then convert the text layer to Rasterize Type :
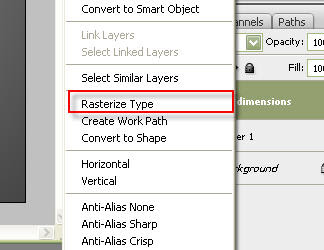
now click right on the document and select perspective :

drag one of the bottom edges outside :
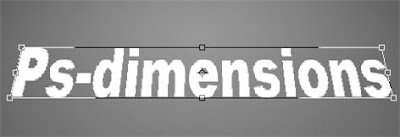
we did the last step to give the text more realistic 3d view
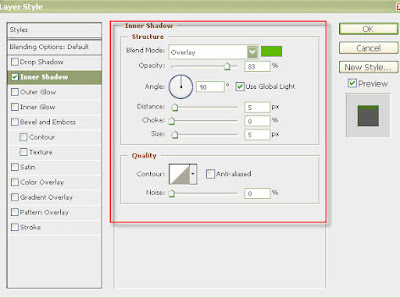
6-Now click right on the text layer check on the Inner Shadow Style and follow the next pic :
(the color of the blend mode is #5dbc09)
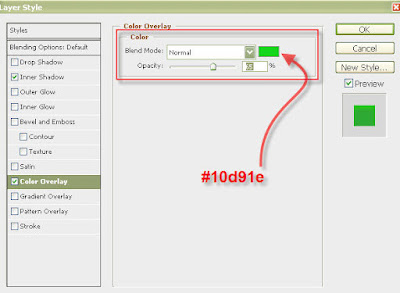
now check on the Color Overlay and put the setting like this:
now check on the Gradient Overlay style and do like the pic :
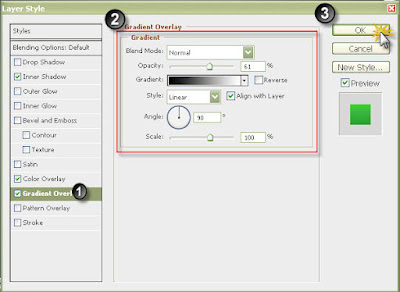
the result now should be like this :

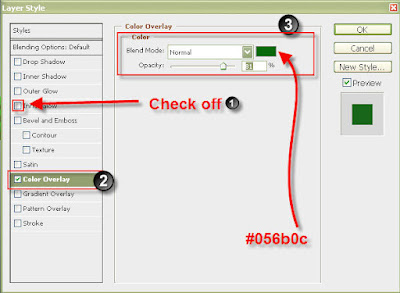
7-Now duplicate the layer go to the blending mode of the first layer (first text layer) check off all the styles and check on the Color Overlay Style and Do like The pic :
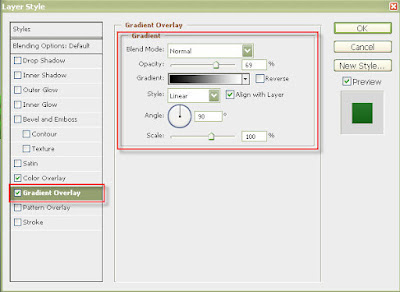
Now check on the Gradient Overlay Style and put the settings like the pic then click OK:
8-now select the first text layer then press (Ctrl+down arrow) one time
you may notice that the first text layer start to appears:

but we want to appears more to give the text the third dimensions but if move it more it will be like a text and his shadow and we don't want that to happens so we will use a lots of layer to give the right 3d effect .
so duplicate the first text layer press (Ctrl+J) then press (Ctrl+Down arrow) to move a little bit to the bottom then press (Ctrl+E) to merge it with the other layer now repeat the previous[(Ctrl+j)(Ctrl+Down Arrow)(Ctrl+J) 4 or 5 times or until you get this shape :

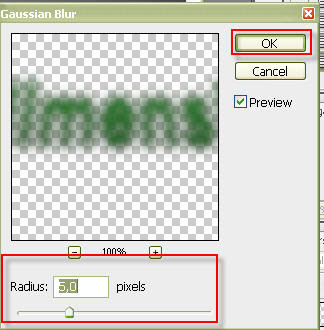
9-now duplicate the first text layer and select the lower text layer
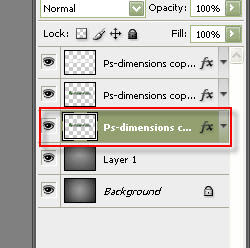
then go to Filter>blur>Gaussian Blur then follow the next pic :
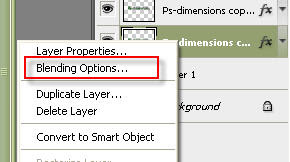
9-Click right on the lower text layer (previous layer) and click on Blending Options
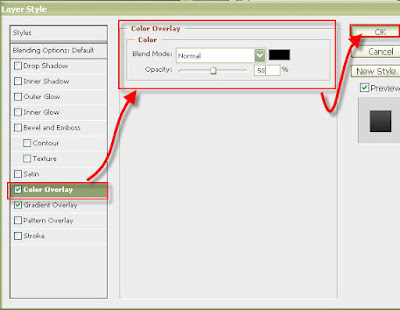
go to color overlay and select the black color as Blend Mode color and set the Opacity to 50 then click OK:
10-Now the last thing we gonna do is to add the brightness to the text.
select the upper text layer :
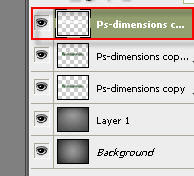
select the Magic wand tool make sure the selection type is Add To Selection then select all the letters one by one like this image:

11-Now select the Elliptical Marquee Tool make sure that select next selection mode (intersect with Selection) :

select the shiny area you want to be in the text with the Elliptical Marquee Tool like this pic:

now the selection should be like this:

12-set the background and foreground Color white like this:

now select the Gradient tool and set the options like this:

now in new layer(Ctrl+Shift+N) Drag From the Bottom of the text to the up like this:

make sure that the previous new layer is in the top of the layers .
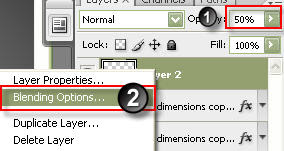
set the opacity of the new layer 50 and click right then click ob Blending Options...
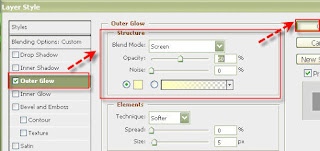
now check on the Outer Glow Style then follow the next pic :
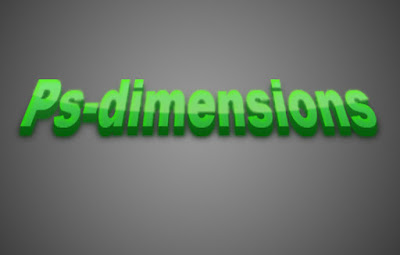
And this is the finale result:

I like to see you comments


0 comments:
Post a Comment