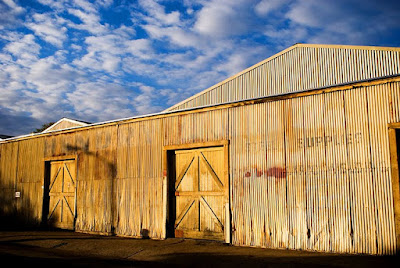
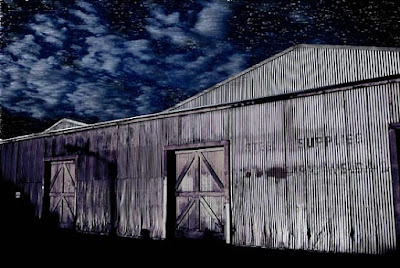
and this is the result:
from this

to this

For this tutorial you have to chose photo where the sky is blue not white i mean you can't chose a photo with too brightness sky i choose this you work on it to :

1-now the first step after you open the photo add a new layer above the background layer and fill with black then change its blend mode to Overlay and your result should be like this :

2-Now add a new layer above the rests fill it with (#7691b9) then do just like in the picture :

3-now all we have to do is adding some stars
add a new layer above the others fill with gray (#777777)
then go to Filter>Noise >Add Noise the do like it appears :

4-Go to Filter>Blur>Blur then go To Filter>Stylize>Wind then follow the next pic :

5-Press Ctrl+I to inverse the colors then change then blend mode (of the last layer) to Hard Light then add a layer mask like the next pic m

6- the only thing left now is to hide the stars from the picture except the sky select a black big Brush for the house then then gray brush for the clouds (on the layer mask)

paint the red spots on the previous pic .
and this is the final result:

i hope to see your comments and your results as well


8 comments:
thank you for the tutorial man
keep it on
thanks bro this really helped me bust a nut
no problem and thanks for your comments
Thanks Brother thx very much
I dont understand Step # 6
Step #6 is total confusion... Can you explain it a little bit?
when & how do u add the stars? do u use a hard or soft brush on step 6?
ya i got confused on the stars too. silly goose
Post a Comment