Before we start if you want to see any pic with big dimensions you just click on it.
lets begin :
1-First open a new page with this dimensions : 640X480
2-Add a new black text:

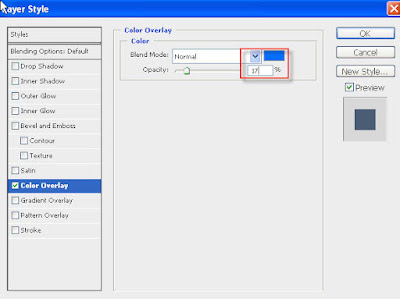
3-Go to : Layer>Layer Style>Color overlay...
then choose a blue color and 17 opacity like this:
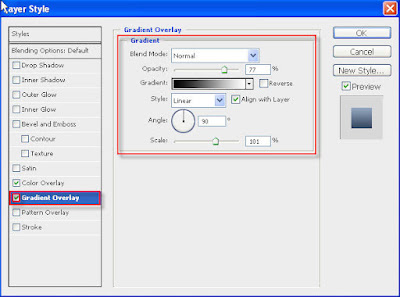
4-Then go to Gradient
5-Now duplicate the text Layer select the bottom one (the original text layer)
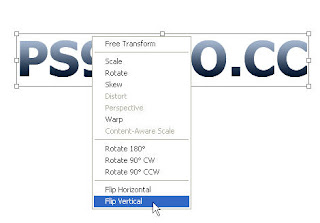
Then click on (Ctrl+T) or go to (Edit>Free Transform) then click right on the text then click Flip Vertical:
6- Now Drag the text down like this:

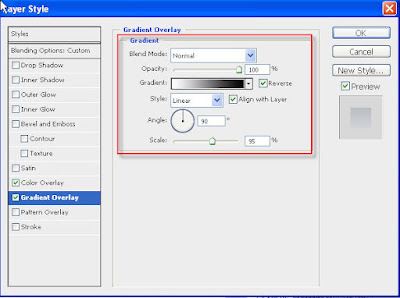
7-Now go Layer>Layer Style>Gradient Overlay then follow this pic:
8- Change the opacity of the previous layer to 17 like this
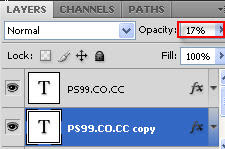
Until now you text should be like this:
9-Now Duplicate the text layer (not the reflection text layer) by pressing Ctrl+J now choose the second one of theme (the one that is lower, just between the two text layer)
then go to Filter>Blur>Gaussian Blur :(then follow this pic):
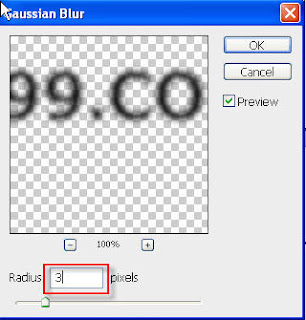
10-Now click on Ctrl+T then select the top edge of the text then drag down just like this:

11-Click right on the text the click on Perspective:
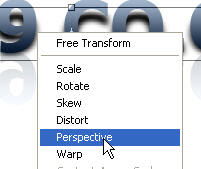
12-now make it like this

13-Press Enter then change its opacity to 50:
15-Add a new layer (go to Layer>New>Layer )then drag it to the top
after that select the brush tool with a medium size ( click Right on the work space to change the size) and start painting with black in the bottom of the text like this:

16-Go to Filter>Blur>Gaussian blur then:
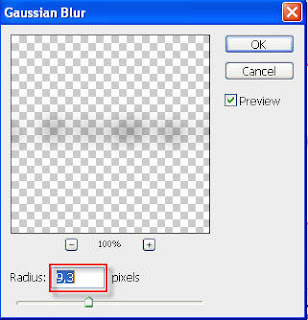
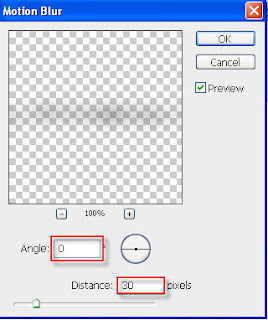
17-Go to Filter>Blur>Motion Blur then:
18-Add a new layer(Layer>New>Layer) then Select the Elliptical Marquee Tool :
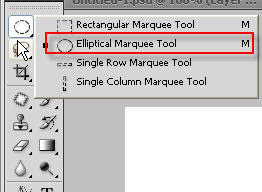
after that select the top area of the text like this :

19-Select the White color as foreground color

then select the Gradient tool and choose this Gradient:(from white to transparent)
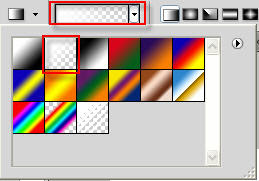
now while holding shift drag a line from down to up like this:

20-While holding on Ctrl select the text layer (the real text layer not the shadow or reflection layers)like this :
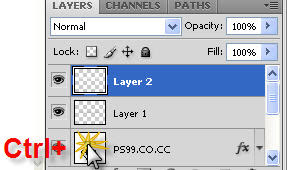
21-Now while holding Alt Add a Layer Mask :
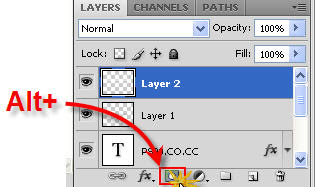
After That Click on Ctrl+I to inverse the layer mask .
22-The last thing to do is changing the Blend mod from Normal to Soft Light like this
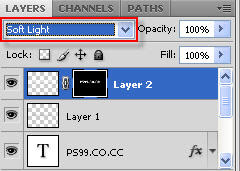
now this is the final result
Finnaly i hope that you got the result you wish and if you like this tutorial pleas please ....l please Retweet It Or leave a Comment .


4 comments:
sweet tutorial! <3
thanks for commenting
very nice, thanks.
i think its helpful for company text logo design
Post a Comment